Have you already checked the System Requirements, installed the USB Reader and logged in? Therefore, you can install and configure your CISA Reader App.
The CISA Reader App is an application created by CISA to operate the USB reader with the commands you send from the cloud.
The CISA Reader App connects to the AERO cloud and when you issue a read or write operation it transfers the command to the USB Reader.

In order to set up your CISA Reader App you need to:
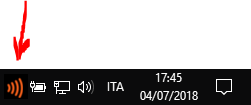
Once installed, the CISA Reader App is started automatically and it can be observed in the Notification Area of Windows (in the bottom right corner of your screen). Its icon is the contactless logo in orange.
Open your favorite browser and login with your credentials.

Click on the red button "Read/write settings" displayed in the header of the web page.
In the page that shows up, scroll to the section "Install and configure CISA Reader App" and click on "Download for Windows" to download the installation file.
Run the file to start the installation wizard and follow the step by step instructions.
It is required to have administrative privileges on the computer.
From time to time the CISA Reader App may be classified as possible 'trojan' by some anti-virus programs.
In such cases the installation might be interrupted or the file 'CISAReaderApp.bat' could be removed from the CISA Reader App program folder and moved to the virus scanner's quarantine area, so the program will not start any more.
These are false reports, known as 'false positive' recognitions.
Should this happen:
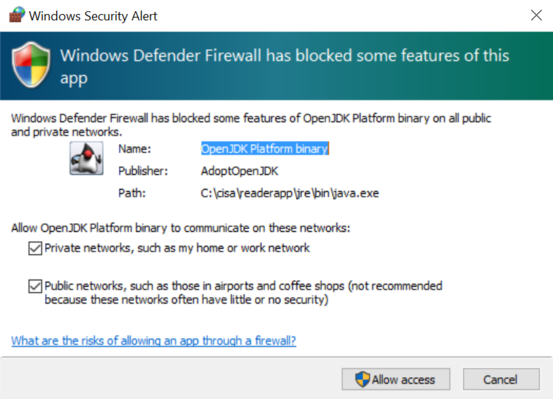
Windows Defender Firewall might warn that some features of your app could be blocked.
Make sure you allow your app to access networks: check both “Private networks” and “Public networks” and click on “Allow access”.
Once you have completed the installation, the CISA Reader App is started automatically and it is set to run automatically at Windows start up.
When the CISA Reader App is running, its icon is displayed in the notification area of Windows.
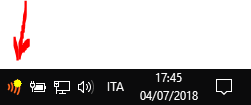
Note: a yellow gear over the icon warns that the application is running but the configuration has not yet been done. Follow the guide below to complete the configuration.
You must be logged in your plant and you must open the page "Settings to read and write contactless cards".
If you have just installed the app and you did not close the browser, you should already be in the correct page, otherwise make sure you are logged in and click the button "Read/write settings" in the header of the web page.
Click the button "Configure CISA Reader App" and a step by step wizard will start.
In the first step you are prompted to enter a description to identify the computer / work-station on which the CISA Reader App has been installed (as an example it could be "Reception", or the host name of the PC...).
Press next when you have done.
In the second step, the browser will display 6 digits.
These digits must be used to authenticate your CISA Reader App to the cloud service.
Right click on the CISA Reader app icon in the Windows Notification Area (in the bottom right corner of your screen).
In the menu that shows up, click on "Authentication code".
The CISA Reader App will display a dialogue.
Enter the 6 digits and press the OK button in the app dialogue.
Keep waiting without closing the browser, until the wizard automatically completes with a successful message.
Your set up will be stored in the cookies of the browser, and the web page header will display the "PC name" that you have provided during configuration.
The link to the "Read/write settings" will be hidden under the "PC name" label.
Nota Bene: the cookies are not shared among different browsers, so the set up must be reviewed if you change the browser.
When you log into your plant with a new browser, the web page header will display the red button "Read/write settings".
In this case the set up is achieved very quickly: just click on the button "Read/write settings" and select the item which corresponds to the CISA Reader App installed in your computer from the items listed in the table.
The same quick settings could be required if you delete the browser cookies.
In case you change the computer, you need to set up from scratch your CISA Reader App with a new installation and configuration.
Each computer must have its CISA Reader App installed and configured.
The same CISA Reader App shall not be used/selected from 2 different computers.
Do not copy the installation folder from one computer to another, because in this way you would copy also the configuration and it would not work in a different computer.
If more than one computer is required, each computer shall have the USB reader plugged in and its CISA Reader App in order to read and write cards.